Serving the Content of your Static Websites Faster with AWS CloudFront

Introduction
A static website is a website that contains web pages with fixed contents. It is made up of HTML, CSS, and JavaScript files and doesn't require any server-side processing. Your website is available worldwide through a static IP. However, if your web server is in one place, and your users are in an entirely different place it might take some seconds until your website appears and loads for your users. Delivering your static content through Amazon CloudFront could optimize delivery times for your users no matter where they are in the world. In this article, we will be going through the setup and host a static website on S3 and accessing the cached website pages using CloudFront content delivery network (CDN) service.
In this guide, we will create a public S3 bucket and upload the website files to your bucket, configure the bucket for website hosting and secure it using IAM policies, speed up content delivery using AWS’s content distribution network service, CloudFront, and access your website in a browser using the unique CloudFront endpoint.
Table of Contents
- Prerequisites
- AWS CloudFront
- AWS S3 Bucket
- Create an S3 Bucket
- Upload Files to S3 Bucket
- Secure Bucket Via IAM (Identity and Access Management)
- Distribute Website via CloudFront
- Conclusion
Prerequisites
To follow along with this tutorial, you should have:
- An AWS account, you can create one here
- A static website or frontend application
AWS CloudFront
CloudFront is a service provided by Amazon.com to enable content delivery on websites. In simple terms, it means your static websites can have super-fast loading rates without spending any dime on expensive CDN services like MaxCDN, Cloudflare, or RapidScale. Your blog could even load much faster than some sites hosted on PHP or any application servers, including those that use Java, NodeJS, and many more. CloudFront offers low latency and high transfer speeds during website rendering. Being able to serve the static content of my websites from multiple edge locations around the world is fantastic. This speeds up site load times for visitors and balances that traffic flow across the Amazon CDN network. With AWS CloudFront, you can securely transfer content such as software, videos, data, and APIs to clients with high transfer speed and low latency. It will cache your content in edge locations and decrease the workload, thus resulting in the high availability of applications (Since the cache is closer to the user, the content will be delivered with minimal latency). It is simple to use and ensures productivity enhancement. It provides high security with the ‘Content Privacy’ feature. It facilitates GEO targeting service for content delivery to specific end-users. It uses HTTP or HTTPS protocols for the quick delivery of content. It is less expensive, as it only charges for the data transfer.
AWS S3 Bucket
Amazon S3 (Simple Storage Service) is a simple storage service designed to store data. With this service, you only pay for what you use, it has a simple web services interface that you can use to store and retrieve any amount of data, at any time, from anywhere on the web. Buckets serve as containers for objects and provide the mechanisms necessary to control access to them, you can think of them as folders. Using an S3 bucket to store your website files has its advantages. With S3, there is no risk of over-provisioning as with traditional servers, it is easy to use, it scales automatically, integration options such as fast content serving with CloudFront, and high availability (Amazon guarantees 99.99% availability of S3 which means there is almost no chance of losing your data. S3 achieves this by replication across multiple data centers).
Create an S3 Bucket
- Navigate to the “AWS Management Console” page, type “S3” in the “Find Services” box, and then select “S3”.

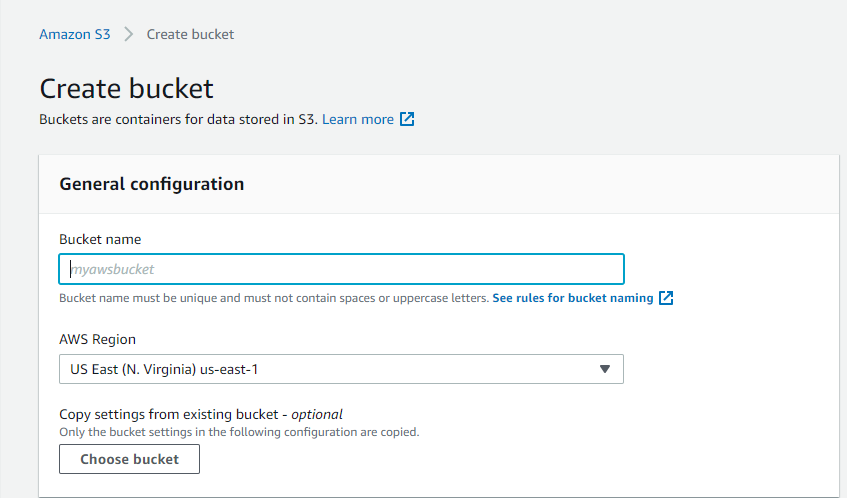
- In the S3 dashboard, click “Create bucket”.

- In the General configuration section, enter a “Bucket name” and a region of your choice. Note: Bucket names must be globally unique.
- In the Bucket settings, in Block Public Access section, uncheck the “Block all public access”. It will disable the Block all public access feature to the bucket objects via the S3 object URL.
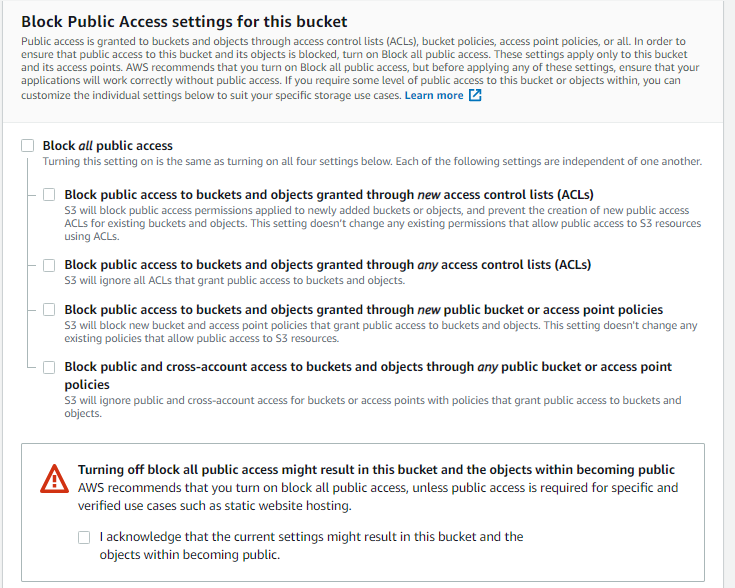 Note - We are allowing the public access to the bucket contents because we are going to host a static website in this bucket. Hosting requires the content should be publicly readable.
You will see a warning notice that turning off block all public access might result in this bucket and the objects within becoming public, tick the checkbox in that section to acknowledge that that is what you want to do.
Note - We are allowing the public access to the bucket contents because we are going to host a static website in this bucket. Hosting requires the content should be publicly readable.
You will see a warning notice that turning off block all public access might result in this bucket and the objects within becoming public, tick the checkbox in that section to acknowledge that that is what you want to do.
Leave the rest of the settings as they are and click on the "Create Bucket" button.
After the bucket has been created, click on the bucket name to open the bucket to the content area. Since you just created the bucket, there are no contents in it yet.
Upload Files to S3 Bucket
- In the bucket content area, click on the "Upload" button.

- Click the "Add files" and “Add folder” buttons, and upload your website file contents from your local computer to the S3 bucket.
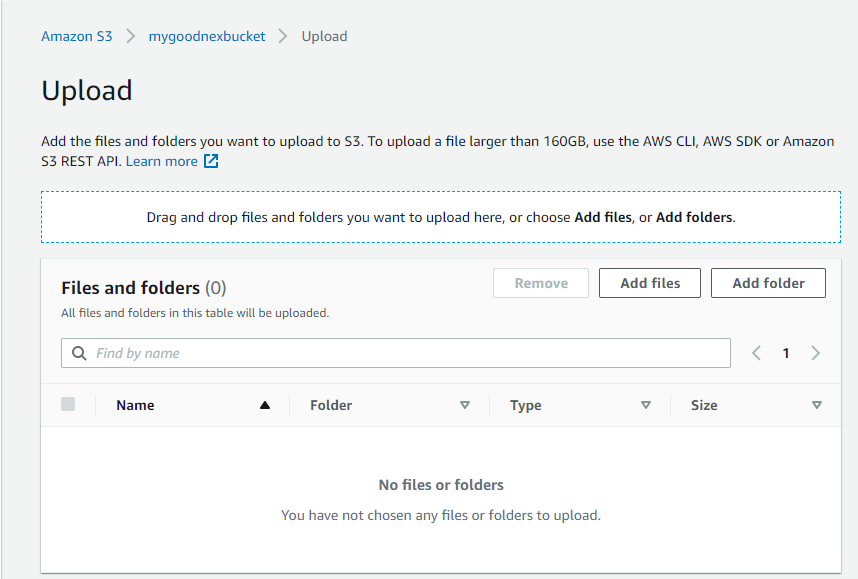
Note - Use the "Add files" button to add files, not in a folder, and use the "Add folder" button to add folders(for example a folder containing the project images). Do not upload the entire project at once by uploading the top project folder, that won't work. Open your project folder on your local computer and upload folders as folders and files as files.
 The above is the structure of my project files and I want to make sure that after uploading them to the S3 bucket that they appear just as they do on my local computer.
-After selecting the files, you still need to click another "Upload" button at the bottom of the page.

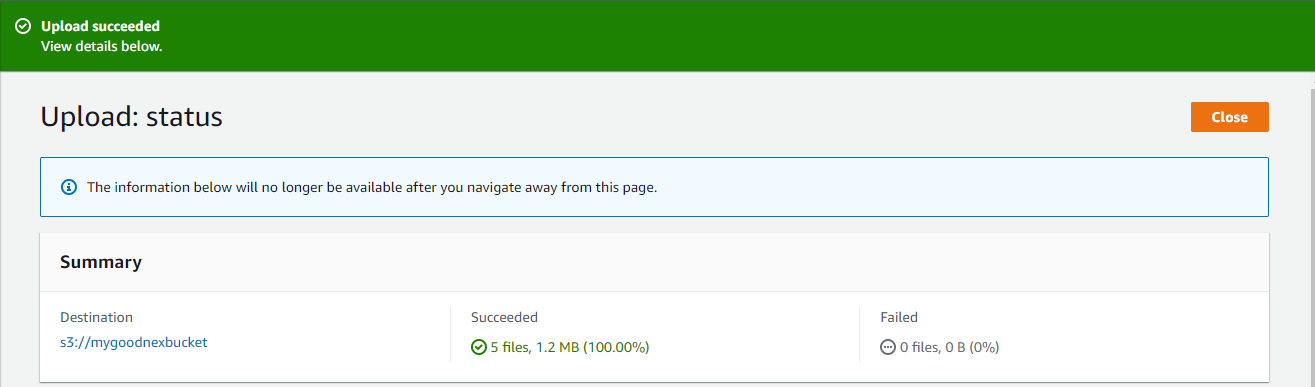
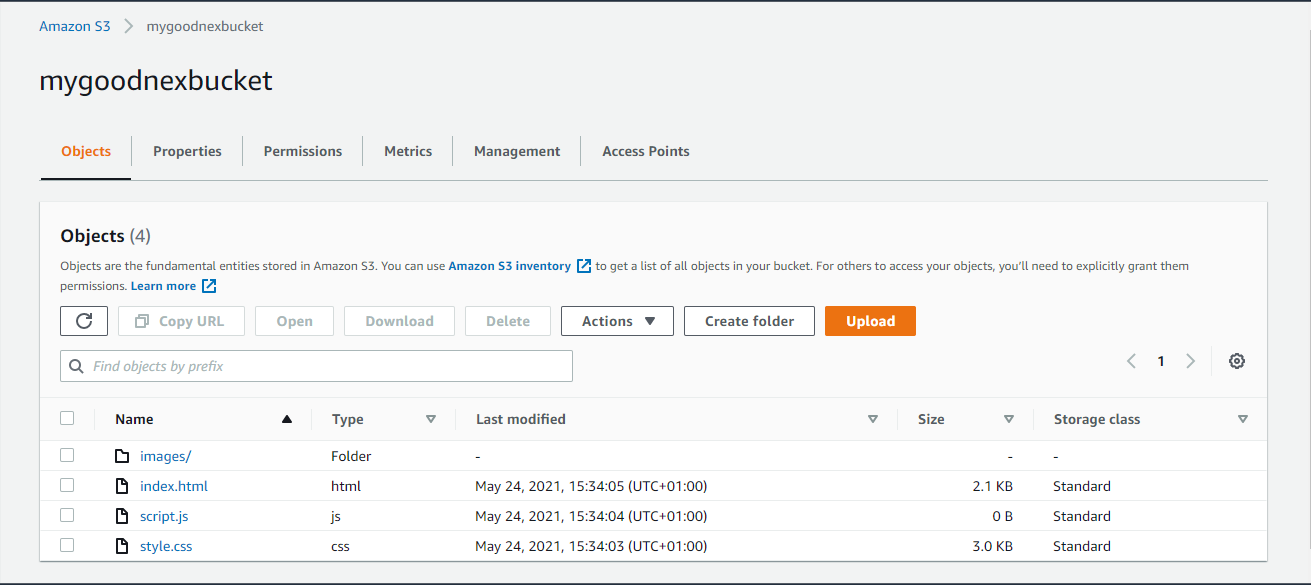
- After the files have been uploaded, you will be notified if it was successful, you can then click on "Close" to go back to that particular S3 bucket dashboard where you will see the folder(s) and files you uploaded. Confirm that they are in the right order and that your index.html file is in the root folder.
Secure Bucket Via IAM (Identity and Access Management)
- From the dashboard of the bucket you created, click on the “Permissions” tab. Confirm that the bucket allows public access for hosting.
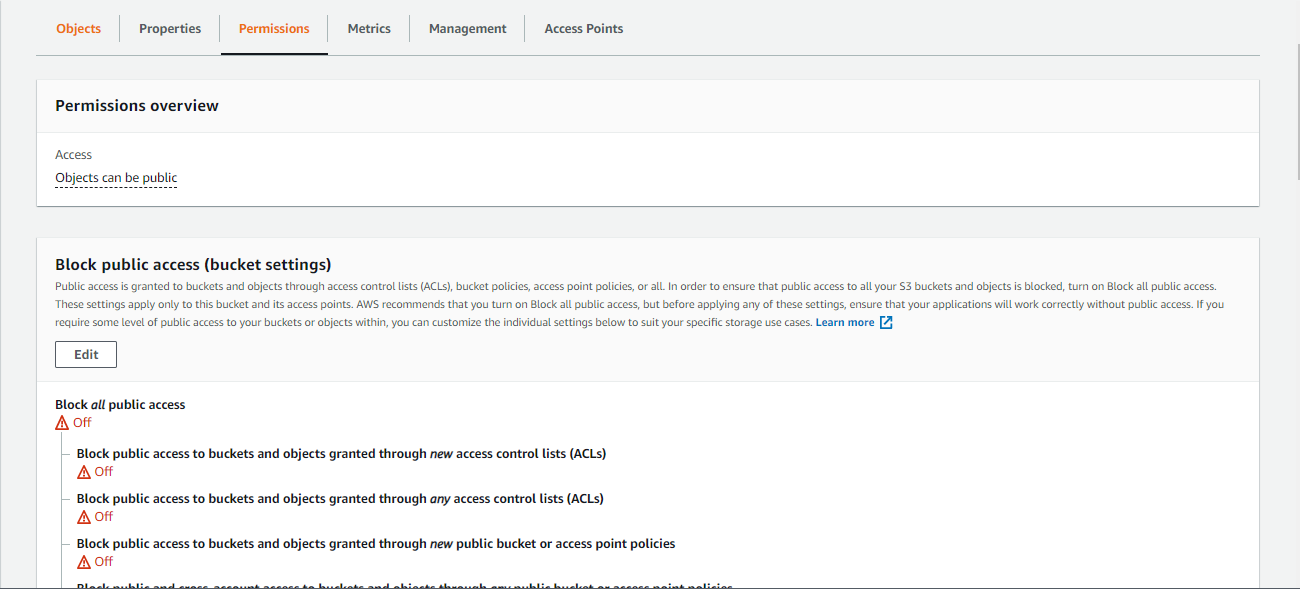
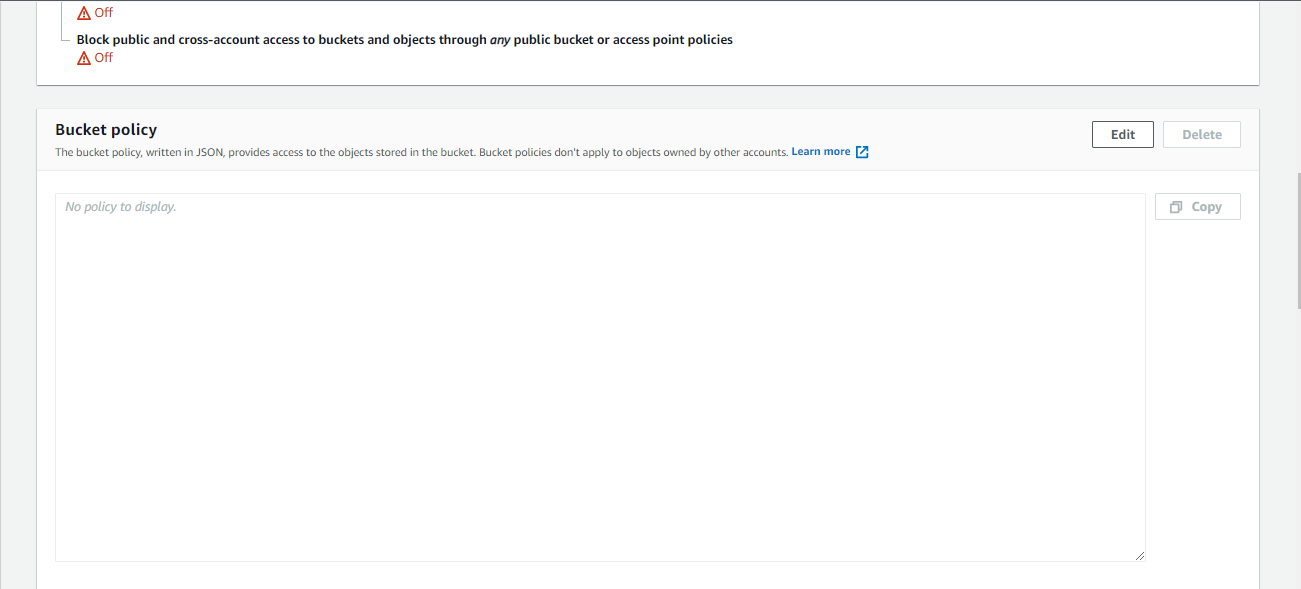
- Still in the permissions area, scroll down to the Bucket policy section. You should see that it is empty, click on the "Edit" button.
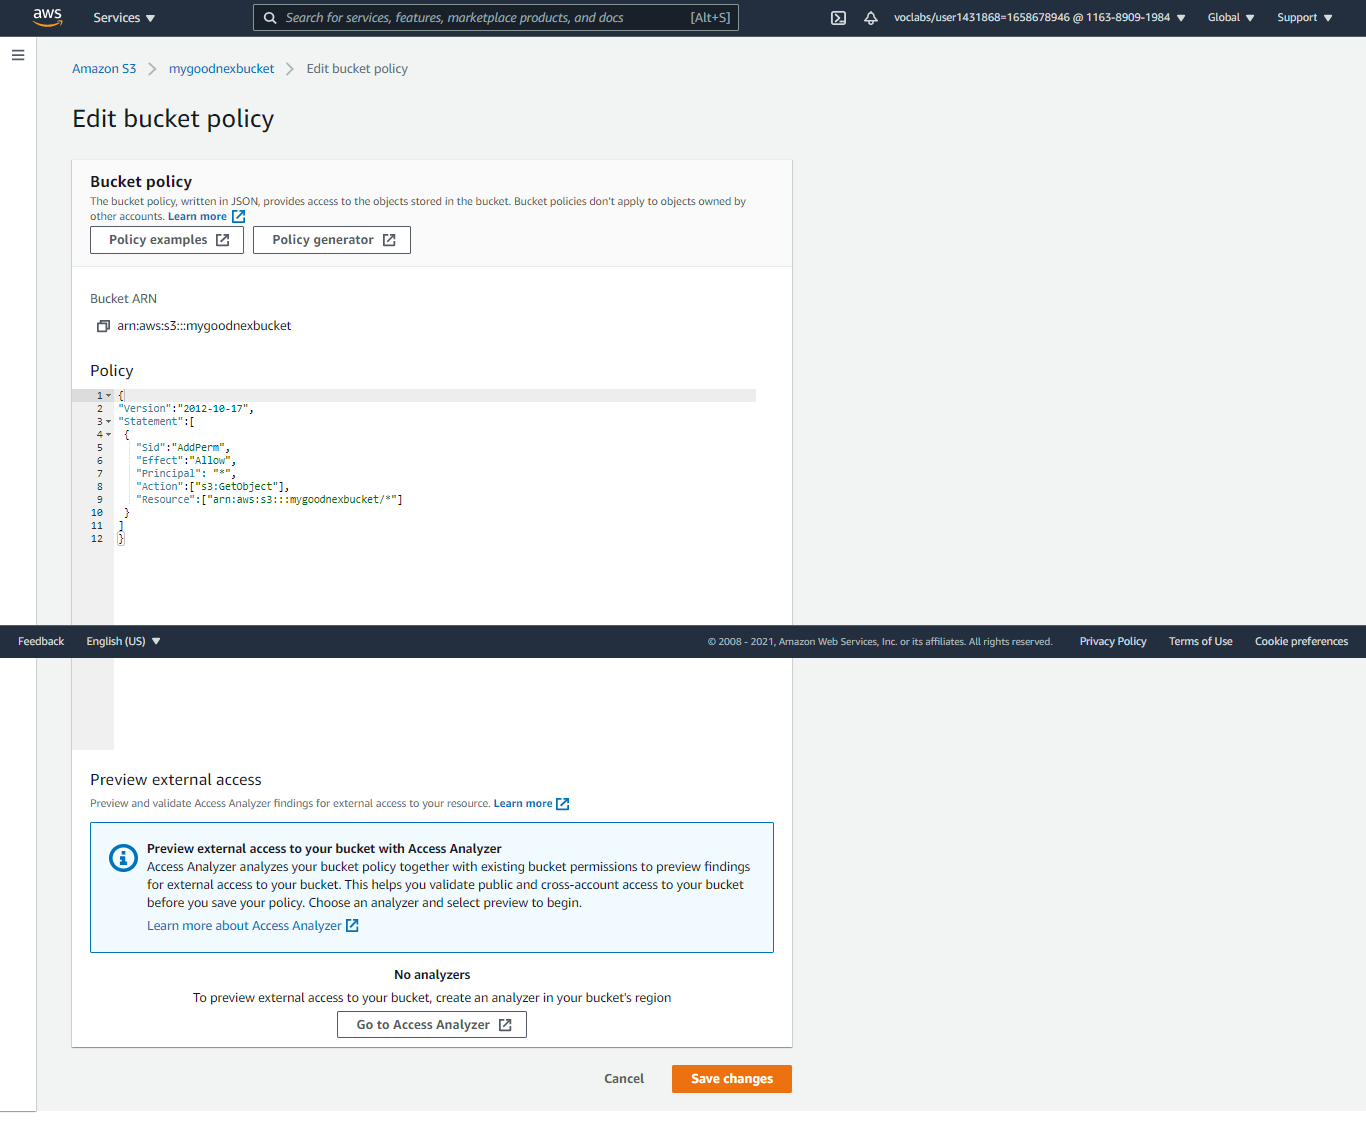
 -Enter the following bucket policy and replace "" with the name of your bucket and click "Save changes" at the bottom of the page.
{
"Version":"2012-10-17",
"Statement":[
 {
   "Sid":"AddPerm",
   "Effect":"Allow",
   "Principal": "*",
   "Action":["s3:GetObject"],
   "Resource":["arn:aws:s3:::<bucket_name>/*"]
 }
]
}
 -After the policy has been changed, you will be redirected back to the permissions area.
Note - If we had made the bucket private, we wouldn't have to specify any bucket access policy explicitly. In such a case, once we set up the CloudFront distribution, it will automatically update the current bucket access policy to access the bucket content. The CloudFront service will make this happen by using the Origin Access Identity user.
- Go to the Properties tab and then scroll down to the Static website hosting section.

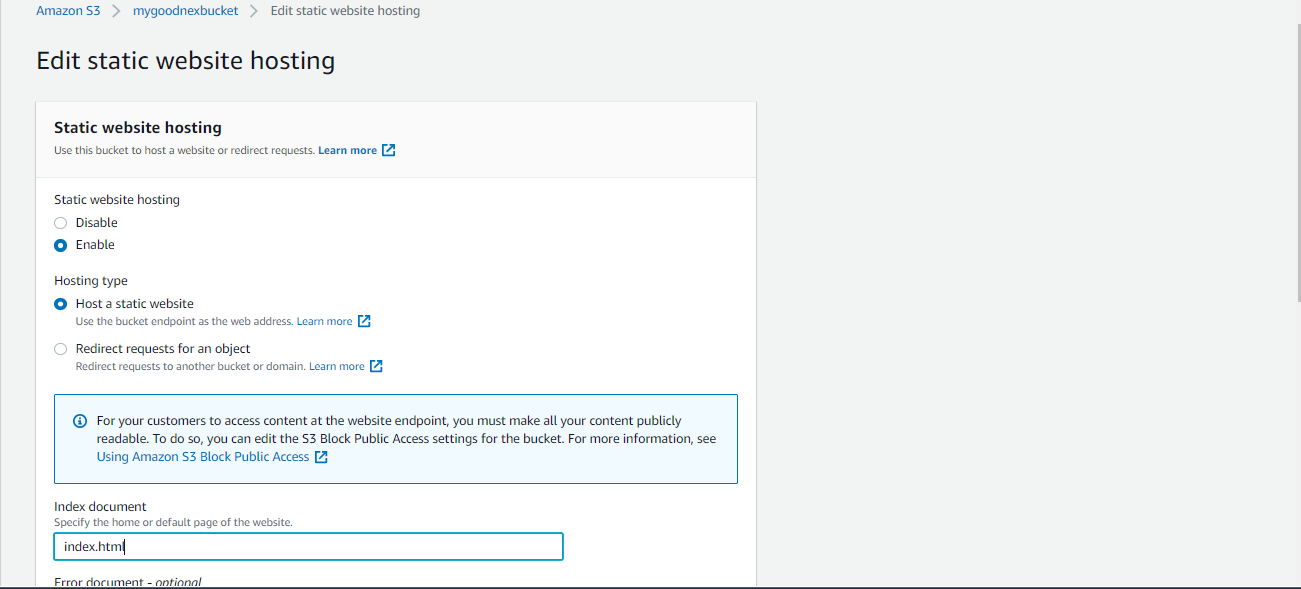
- Click on the “Edit” button to see the Edit static website hosting screen. Now, enable the Static website hosting, and provide the default home page and error page for your website. For my project, the index page or homepage is in the index.html file so I input that in the "index document field", I also inputted index.html in the "error document" field for testing purposes but you can either leave it blank as it is optional or put the document there also. After inputting those, click on "Save changes"

Did you notice that enabling static website hosting requires you to make your bucket public? In the snapshot above, it says "For your customers to access the content at the website endpoint, you must make all your content publicly readable."
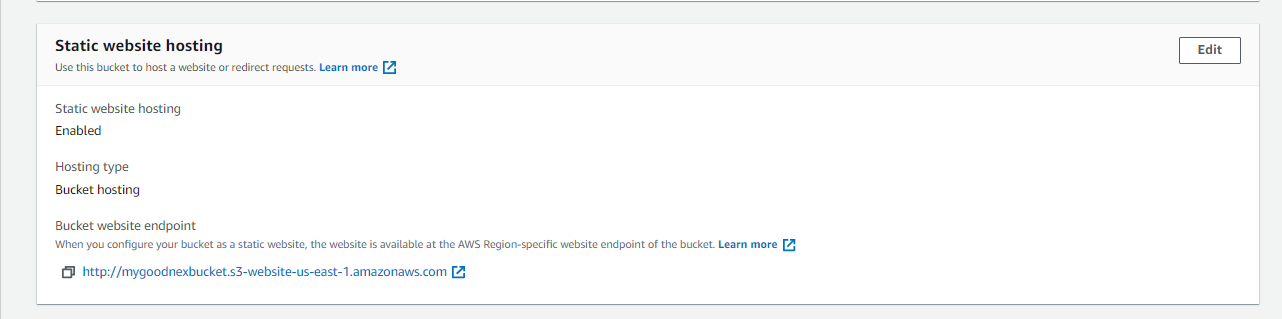
- After successfully saving the settings, scroll down to the Static website hosting section again in the Properties area and you should now be able to view the website endpoint as shown below:
Distribute Website Via CloudFront
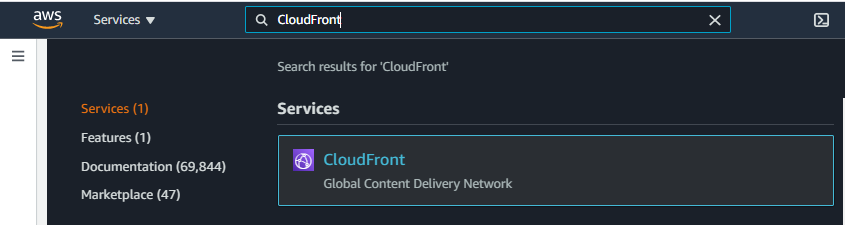
- From the search field at the top of your AWS console, search for "CloudFront" and select "CloudFront" in the search results.
- From the CloudFront dashboard, click “Create Distribution”.

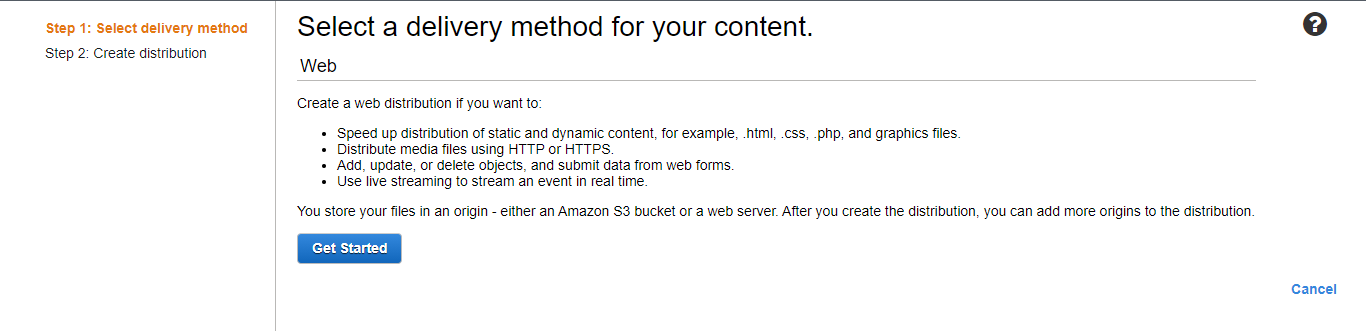
- On the new page, for “Select a delivery method for your content”, click “Get Started”.
- Fill the Create Distribution settings form, under Origin Settings, in the "Origin Domain Name", select the S3 bucket you created earlier. In the "Origin Path" field, enter "/" to indicate the root level. For the "Restrict Bucket Access", select "Yes", for "Origin Access Identity" select "Create a New Identity" (Allow access to the S3 content using CloudFront URL ), for "Grant Read Permission on Bucket", select "Yes, Update Bucket Policy".
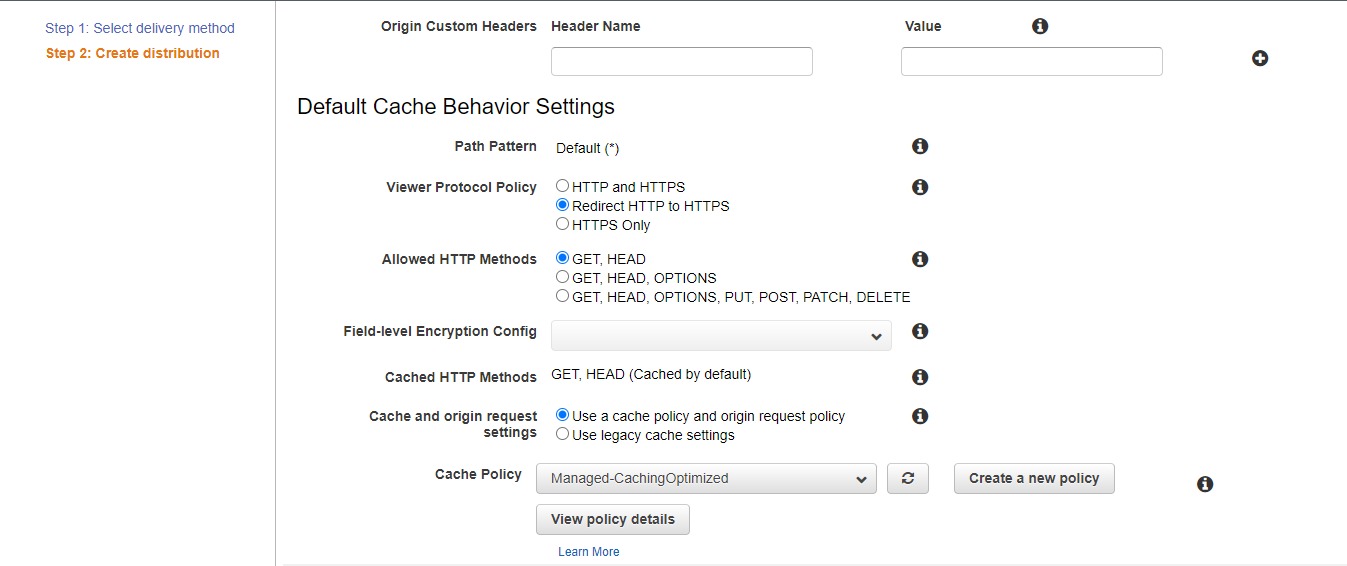
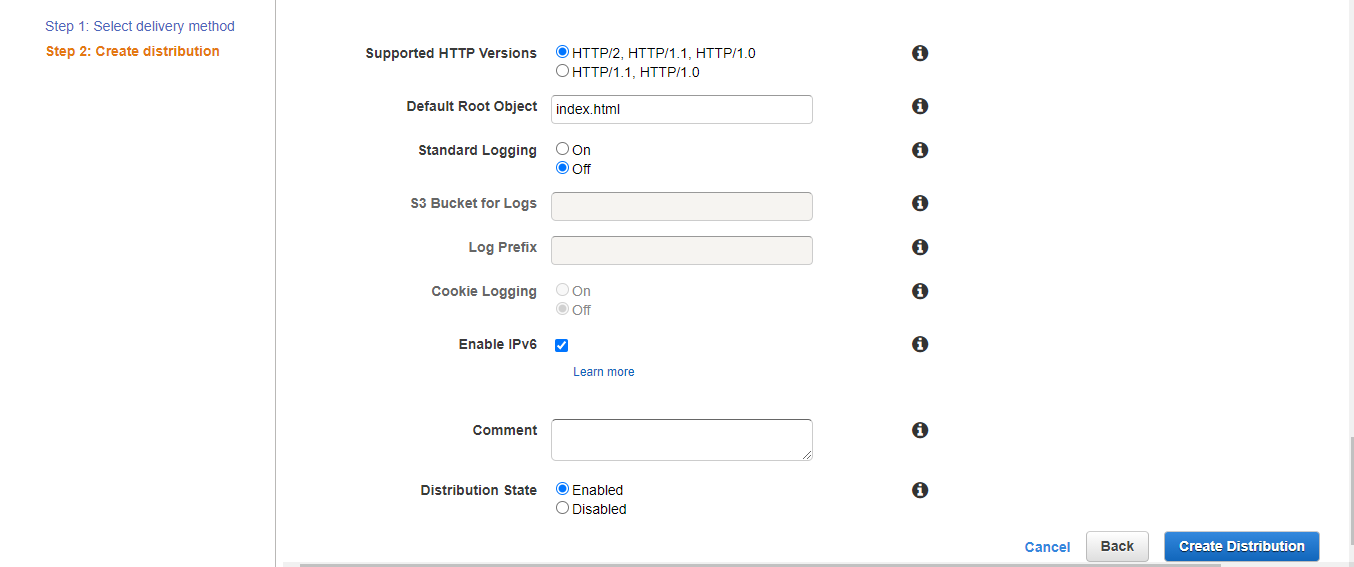
- In the Default Cache Behavior Settings, in the "Viewer Protocol Policy", select "Redirect HTTP to HTTPS".
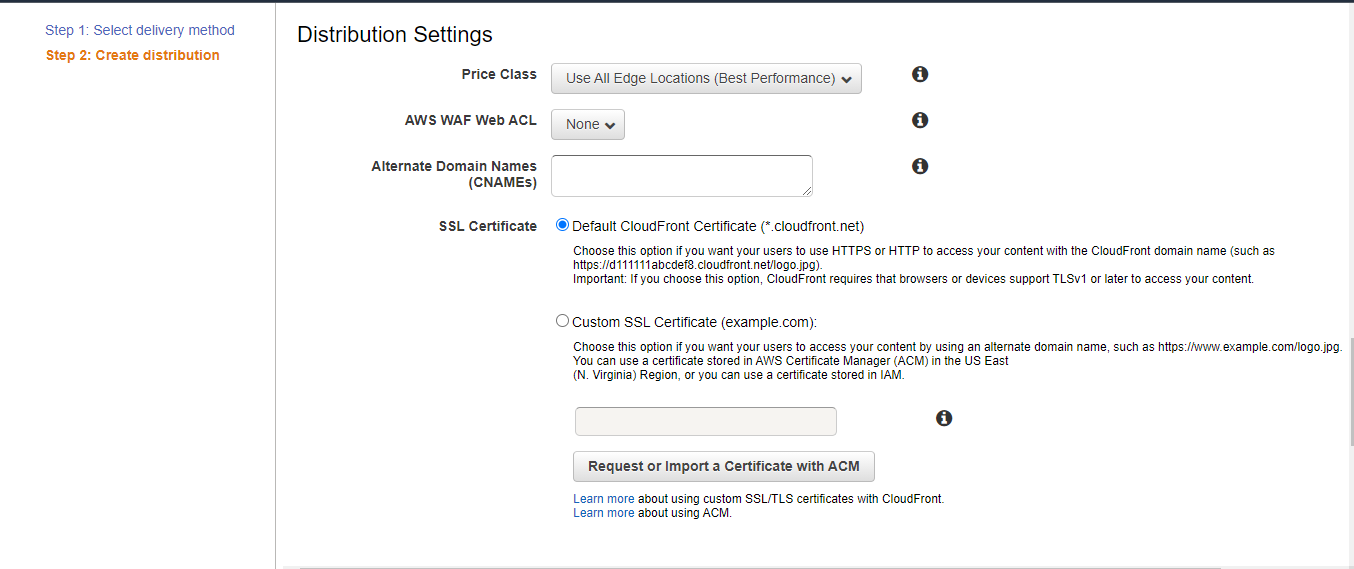
- In the "Distribution Settings", for the "Default Root Object" input "index.html" (This file residing at the root level, will be the default landing page).
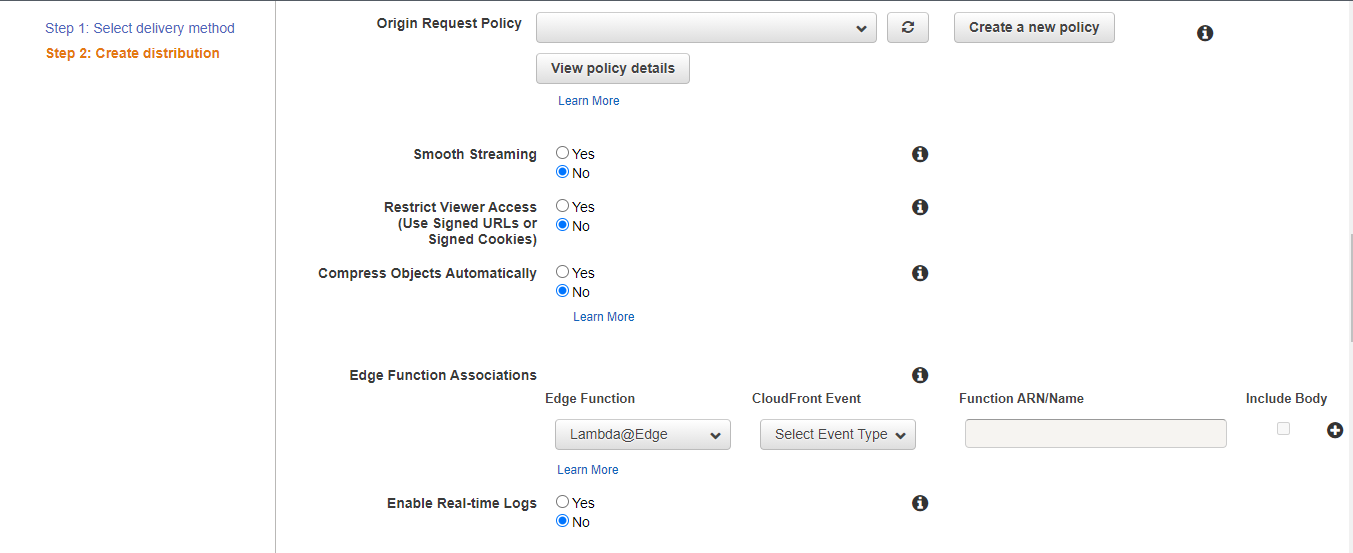
- Leave the defaults for the rest of the options and fields and you should have something as seen below:
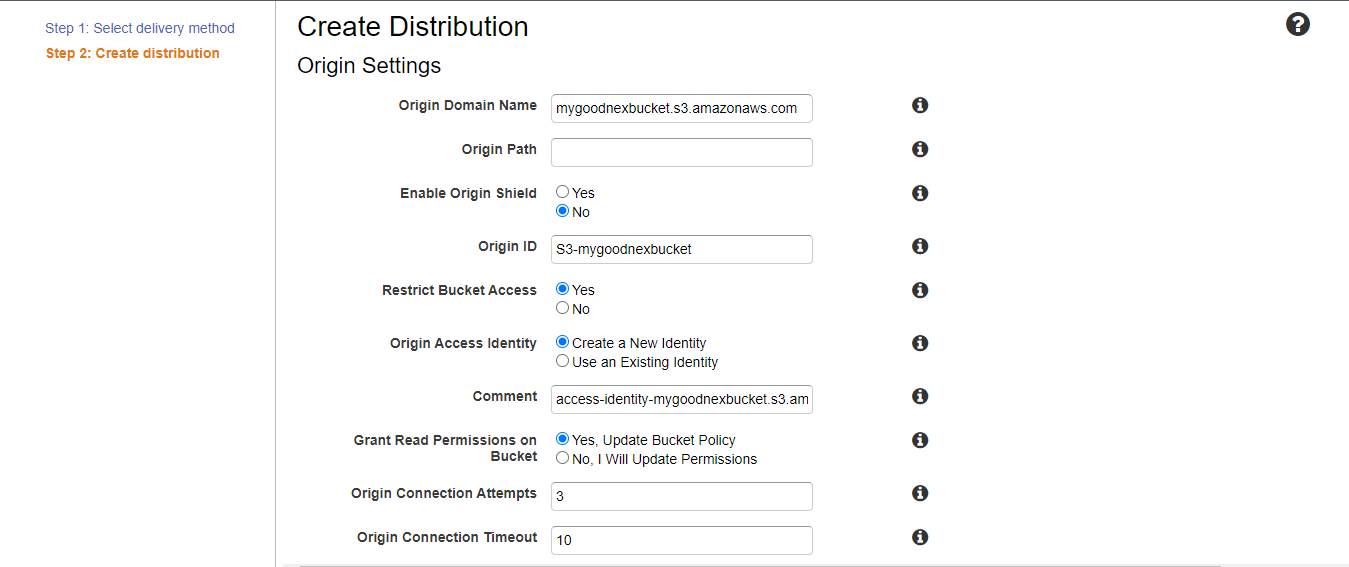
Note - the Grant Read Permission on Bucket says that Yes, update access bucket policy automatically to allows the Origin Access Identity user access to the bucket content. Origin Access Identity user represents the CloudFront service.
- After confirming your values, click on the "Create Distribution". It may take up to 10 minutes for the CloudFront Distribution to get created.
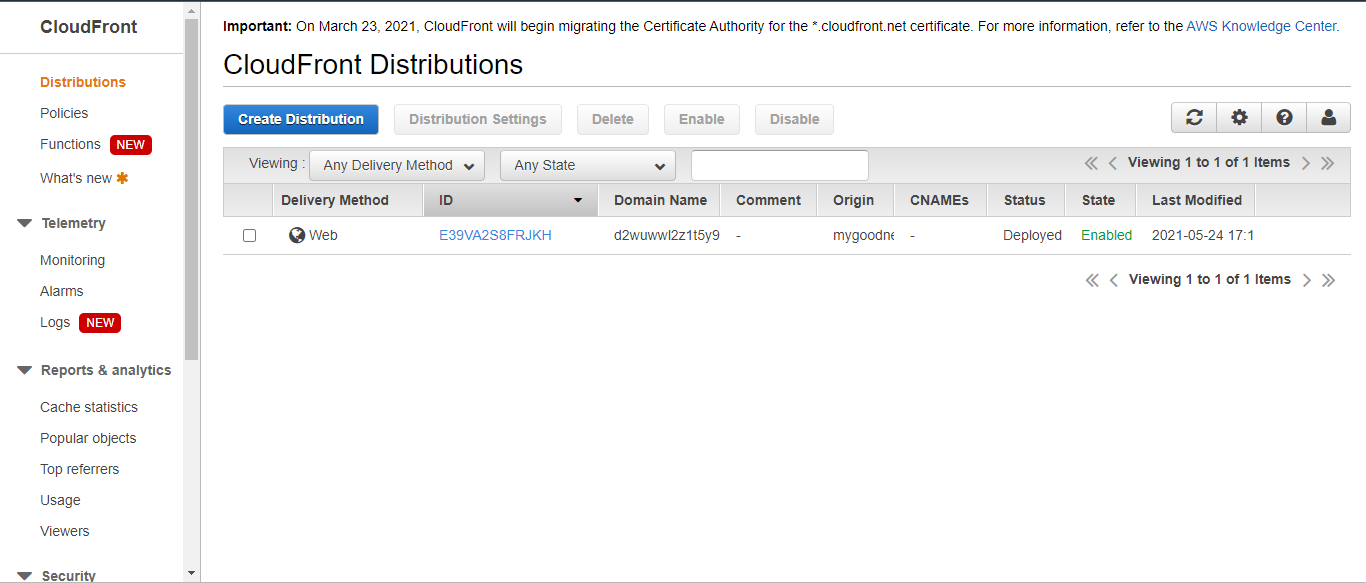
- Go back to your distributions page. Once the status of your distribution changes from “In Progress” to “Deployed”, copy the endpoint URL for your CloudFront distribution found in the “Domain Name” column and append ".cloudfront.net" to it in your browser.
You can also access the website via website-endpoint, such as "http://.s3-website.us-east-2.amazonaws.com" and using the S3 object URL such as "https://.s3.us-east-2.amazonaws.com/index.html". All three links: CloudFront domain name, S3 object URL, and website-endpoint will show you the same index.html content.
If we were not "hosting" the website on S3, we could have made the bucket private and host the content only through the CloudFront domain name. In such a case, the S3 object URL and website-endpoint couldn't access the private content.
Checking that it works:
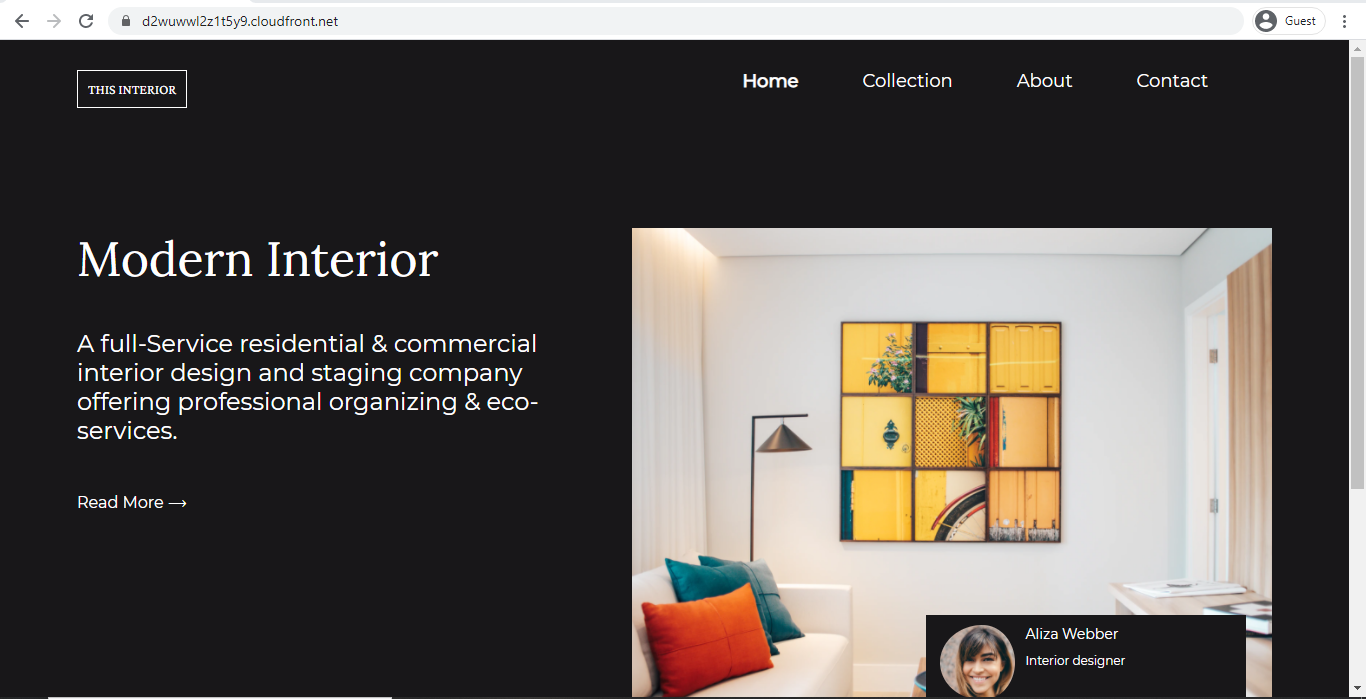 Accessing my static page using the CloudFront domain name. Yay! 🎉🎉🎉
Conclusion
You can see how easy it is to host a static website using services and also serve the contents of static websites faster using AWS CloudFront. Hope you found this guide useful and that you learnt something new.
Resources
https://docs.aws.amazon.com/AmazonS3/latest/userguide/WebsiteHosting.html
https://aws.amazon.com/cloudfront/
https://adamtheautomator.com/aws-s3-static-ssl-website/

